Our housemate needed extra storage for her hobbies (crochet, beading,
etc.), and standard dressers and cabinets did not fit her needs. After
discussing what is needed, we came up with the plans for a configurable
bunk bed and storage unit. The main corner stands are 4-inch by 4-inch
redwood beams, and the side legs and cross-pieces are 2x4 fir.
Click on the thumbnails to view details |
 |
 |
 |
Drilling and counter-sinking the holes for the bolts. I made a
jig of scrap wood to ensure each hole was drilled in the exact
center of the cutout. The bolt holes were cut in two stages.
|
|
First, I used my 1-inch Forstner bit to drill
a hole just deep enough to accept the 1-inch washer and a 5/8-inch
bolt head on one side, and a 1-inch washer and 5/8-inch nut on the
other. After drilling the holes for the washers, I drilled 5/8-inch
holes through the center of each hole for the bolts. The holes are
offset on the 4x4 beams to allow the horizontal support beams to interlock
on the beams.
|
 |
 |
 |
Completed support beams ready to assemble. After these
were done, I cut the horizontal support beams that interlock onto the
corner assemblies.
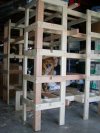
Main unit assembly: I had placed a scrap piece of plywood on the lowest
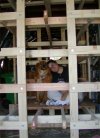
level so I could stand and work inside of the framework. Mou came down
to see what was going on and sat down; Simba (my wood-working inspector!)
immediately joined her
|
 |
 |
 |
Shasta wanted in on the inspection as well, then Shasta heard the
cats running up and down the hallway upstairs and ran off to bark at
them. The cats quieted down, and Shasta came back.
|
 |
 |
 |
After making certain all pieces fit correctly, I took them out in
the back yard and gave them several coats of boiled linseed oil over
a period of a week.
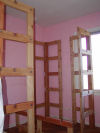
When the linseed oil dried, I brought the pieces upstairs and started
assembling them in STella's room - STella's cat Rhiannon was very curious!
|
 |
 |
 |
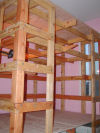
Rhiannon was walking along one beam when Harley, my cat, arrived. Harley
made his way to the top, and watched Rhiannon walking the beams below
very intently. I think the cats found a new (temporary) toy!
|
 |
 |
 |
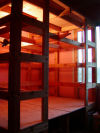
It was getting near twilight, so we attached a clamp-lamp to the frame
and took the picture on the left. On a whim, I turned off the
room light - and was pleasantly surprised by the golden glow that resulted. The
picture on the right was taken the next morning after I'd cut out,
sanded, and inserted three of the four "attic" panels.
|
 |
 |
 |
Stella wanted to see what it was like before I got the bottom platform
in - yoga, anyone? After I got the platform and matress
in, she tested which way she wanted to set up the bed - Harley
came in and jumped up next to Stella, then left when Rhiannon jumped
up to check things out.
|
 |
 |
 |
Rhiannon discovered that the vertical beams make great neck-scratchers!
|
 |
 |
 |
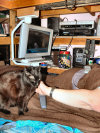
TV ceiling slide assembled; shown in collapsed configuration, expanded
configuration - and installed with one Very Happy Camper! However, camera
flash units completely wash out LCD screens as we found out.
|
 |
 |
 |
Stella's moving the TV closer to see how close it can come - very close,
and it even clears Rhiannon; then STella settled in and peacefully relaxed,
as did Rhiannon with a Halloween kitty.
|
| |
|
|
|
|
Work remaining to be done:
-
Fasten the shelves down
- Create a mount for STella's computer on the outside of the shell, and
run the cables to the LCD TV/monitor.
|
- Mount the speakers inside the shell and run cables to the stereo,
which is now on one of the shelves inside.
|
|


